How to Join Quilt Binding Strips (And Calculate How Much You Need)

How to Join Quilt Binding Strips

Welcome to Post 3 in the Quilt With Kim Binding Series! We're building up a really useful set of skills here to learn how to make binding for your quilts.
 
If you've jumped in here and need any of those earlier posts, here they are:
👉 Which Type of Binding Do You Need?
👉 How to Cut Your Binding Strips
 

This week, we're covering two things that naturally go together: working out how much binding your project needs, and then joining your strips to make one long length.

🎥 Watch A Quick Video

How Much Binding Do You Need?

This is simpler than it sounds. Here's the method.
 

1. Take your ruler and measure each edge of your project. Then add all those measurements together. That gives you the total perimeter of your quilt, table mat, or whatever you're binding.

Let's use an example. Say your project is 20 inches wide and 16½ inches tall (a small table mat, perhaps). Here's the sum:

20 inches (top)
+ 20 inches (bottom)
+ 16½ inches (left side)
+ 16½ inches (right side)
= 73 inches of binding needed

That's the minimum length you'll need of the finished, joined binding strip.

💡 HOWEVER: ALWAYS add extra on top of that total to allow for the joins and the overlap at the start/finish when you attach your binding. I'd suggest at least 10 - 12 inches which also allows a bit of breathing room. Running short of binding when you're almost finished attaching it is one of those deeply frustrating experiences that's very easy to avoid. So....
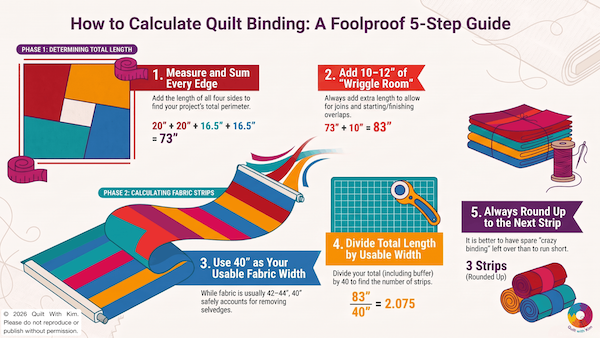
Infographic showing how to calculate quilt binding in 5 steps: measure and add all quilt edges, add 10–12 inches for joins, use 40 inches as the usable fabric width, divide the total length by 40, then round up to the next whole strip.
2. Add together the number of inches of binding you need together with the extra wriggle room of 10 - 12".

Our example would become:

73" + 10" = 83"

This is how many inches of binding you need.

3. To calculate how many strips of fabric you need to cut:

An average width of fabric is 42 - 44", HOWEVER some of that is taken up with selvedges, so I only ever use a width of 40" for my calculations.

Given that then, we need to divide our total number of inches by the usable width of fabric. So - 

83" / 40" = 2.075 strips

4. I also round up, so I'd cut three strips of fabric at the width you have chosen (normally 2.5" if you use my method).

I would rather have spare binding strip left over than be short. You can always use up left over binding in other projects (crazy binding looks fab!).

Why You'll Almost Certainly Need to Join Strips

Most of the time, the strips you've cut simply won't be long enough on their own. A full-sized quilt might need 200" plus of binding. Even a small table mat may need more than a single strip's length. So joining is a normal, expected part of the process.
 

The joining method we're about to look at produces a seam that sits beautifully flat when the binding is folded, and it works equally well for both straight grain and bias binding strips. The process is identical for both.

What You'll Need:

- Your binding strips
- Pins
- A pencil or fabric marker (sparkly ones are entirely optional but obviously very encouraged)
- A small ruler
- Scissors or rotary cutter
- Your sewing machine with an open-toe presser foot
- An iron and ironing board

Why Don't We Join Strips Straight Across?

Before we get to the method, let's quickly address why we don't just sew the strips end to end in a straight line.
 

It seems like the obvious way, and - I grant you - it does look very satisfying for about five seconds. But a straight seam creates a thick, ridged join that can show through to the front of your binding and is also more likely to come apart with use. The diagonal method we're about to use distributes the seam across a wider area and lies almost completely flat once pressed. It's worth the extra minute it takes.

How to Join Your Binding Strips: Step by Step

Now for the slightly more involved bit. Don't worry, it's very manageable once you know the steps.

Step 1: Place two strips right sides together at right angles
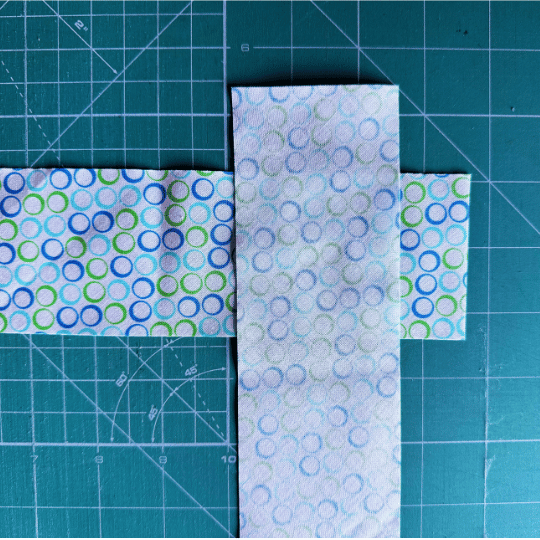
Take two binding strips and place them right sides together, but at a 90-degree angle to each other - like an upside-down L shape. Make sure they're properly aligned, not wonky. Give them a pin to hold them in place while you work.
Two quilt binding fabric strips placed right sides together at right angles, ready to be joined diagonally.

Step 2: Draw a diagonal line

Using your ruler and pencil, draw a straight line from the top left hand corner of the overlap (where the two strips cross) diagonally down to the opposite bottom right corner. This line goes from corner to corner of the square where the fabrics overlap.
 

You should be able to see the line running from one corner of the top strip to the other. That's your sewing guide.
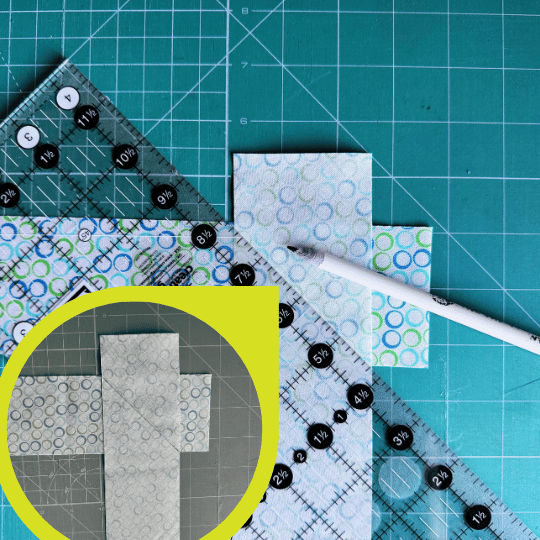
Quilting ruler and pencil used to draw a diagonal sewing line across two quilt binding strips placed right sides together.

Step 3: Sew along that line

Take it to your machine, pop on an open-toe presser foot (or keep on your walking foot if it's still on your machine), and set your needle to the central position. Your stitch length can be 2mm to 2.5mm: a slightly shorter stitch here is fine as this is a seam that needs to hold.
 

Pin your strips a good distance away from either side of the pencil line. This will hold your strips together, but still allow the presser foot to pass through.

Sew from top left diagonal corner to bottom right diagonal corner, following that diagonal pencil line exactly.

You will probably need to start sewing on a leader (a small scrap piece of fabric) then continue onto your binding fabric, because there is not much fabric at the corners for your machine to hold on to, and it can have a habit of chewing the corner of the fabric up. The leader will stop that happening. You can find out about leaders (sometimes called thread savers, although I have no idea why!) here.
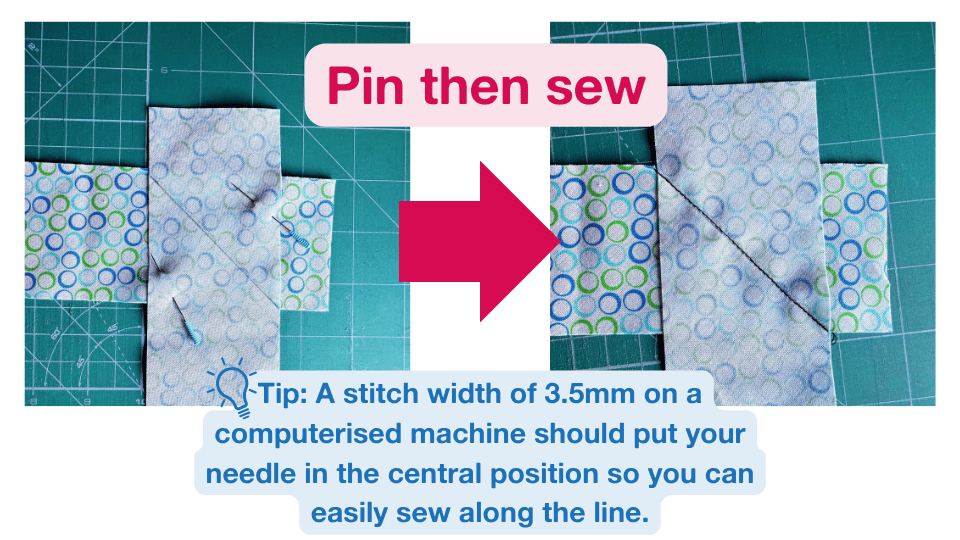
Two quilt binding strips pinned right sides together along a marked diagonal line, then sewn along the line to create the join.

A Word on the Open-Toe Foot If You Use One
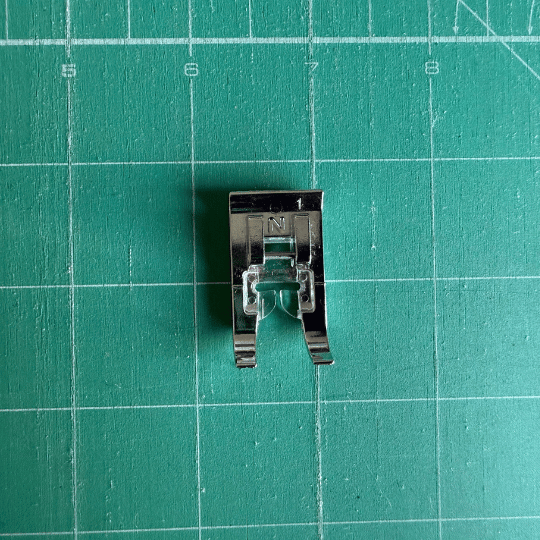
The open-toe presser foot is particularly useful here because it gives you a clear view of the needle and the line you're sewing along. If you haven't used one before, it's well worth trying for any task where accuracy matters.
Open-toe sewing machine foot shown on a green cutting mat, used to give a clear view of the stitching line while sewing.

Step 4: Check before you cut

You've heard the adage - measure twice, cut once...this is similar: check twice, and cut once. Sewing you can un-pick. Cutting is irreversible.
 
Open the two strips out and take a look. If the join is correct, they'll unfold into one lovely long strip of the right sides on the same side, with no twist. If something's gone wrong, you can employ the use of your best-friend-the-seam-ripper and then re-sew.
 

If it opens out beautifully into one long strip (which it should), close it back down into that right angle and then we can cut (the next step).
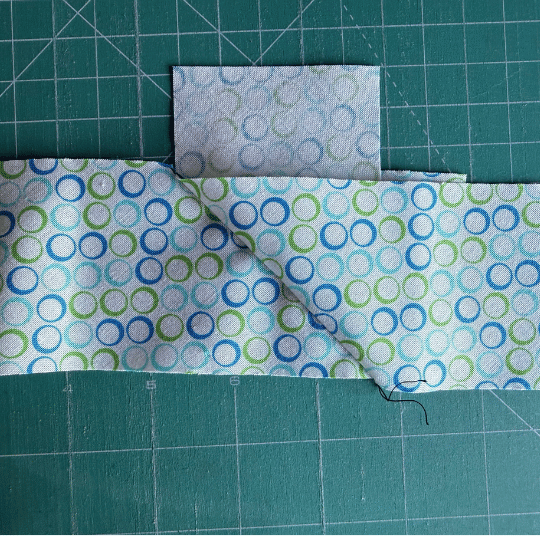
Joined quilt binding strips opened out to check the diagonal seam is correct before trimming away the excess fabric.

Step 5: Trim the tails

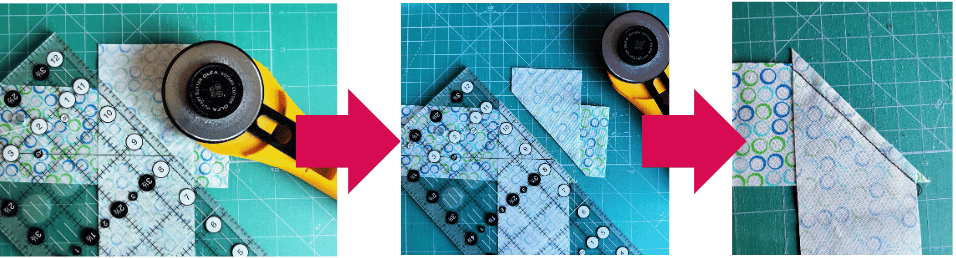
Using your ruler, line up the quarter-inch mark along the sewn line. Cut the little tails off at a quarter of an inch from the seam. You don't need those excess triangles, and they'd just get in the way.
 
One of my students made bunting for fairies out of them (I actually think for her granddaughter, rather than the fairies residing at the bottom of her garden under the blackberry bush, but who knows).
Three-step sequence showing how to trim a diagonal quilt binding join, cutting away the excess fabric and removing the small corner “ears”.
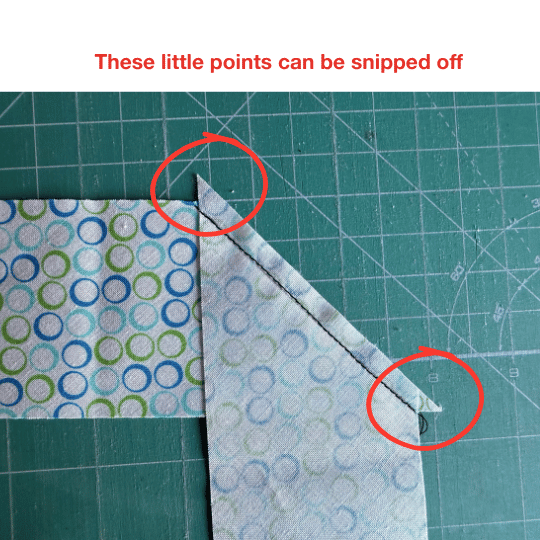
Close-up of a diagonal quilt binding seam showing the small fabric points at each end that can be snipped off before pressing the seam.

Step 6: Press the seam

Using your iron, press that seam open or to one side. Whilst it doesn't actually matter, I always press to one side as I find it easier, but it's your choice. Either way, you'll end up with a neat, flat join that sits beautifully when the binding is folded and attached.
 

Repeat this process for every join you need to make, until your strip is the full length required for your project.
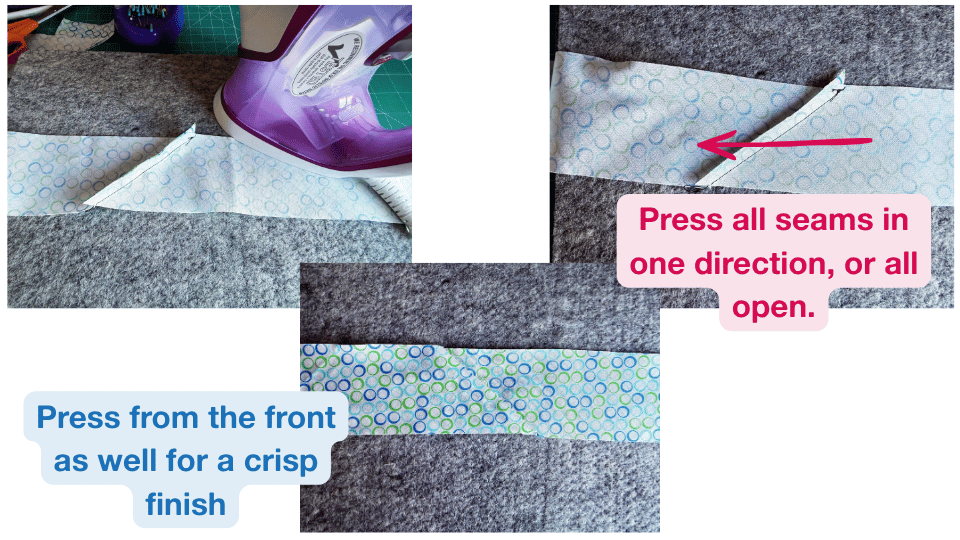
Three-step sequence showing how to press quilt binding joins: press the diagonal seams in the same direction or open, then press from the front for a crisp, flat finish.

What's Next

You've now got your binding cut and joined. The next step is to fold it into binding ready to attach to your quilt.
Bookmark this post so you can work through the series as you need it. You don't have to do it all at once - take it at your own pace.
See you next time,
Kim xx
PS If you're new to quilting and still finding your feet, my free Beginner Quilter's Quick Start Toolkit is a great place to start. It covers all the essentials in one place and it's completely free.
 
You can grab your copy here: https://www.quiltwithkim.com/toolkit
Loading...
Kim Reynolds
09/21/2026 19:30:00 +0000
Kim Reynolds - Founder of Quilt With Kim
Kim is the founder of Quilt With Kim, a trusted resource for quilting beginners. With over seven years of experience inspiring students to explore their creativity, Kim specialises in teaching patchwork and quilting through easy-to-follow courses and tutorials.
 
She holds a City & Guilds qualification in Patchwork & Quilting and loves helping beginners create their first quilts with confidence.


Kim also hosts a popular YouTube channel, Quilt With Kim, where she shares tutorials and tips tailored to beginners. She has also taught patchwork live on air on Sewing Street on TV.

Based in Gloucestershire, UK, Kim enjoys yoga, cooking, and seaside and country walks with her husband, Nige. Her chief quilting assistant, Shadow the cat, is always on hand to supervise her projects.

Download the FREE Beginner Quilter's Toolkit - a free guide to help you to know how to get started with quilting and to join Kim's newsletter list and begin your quilting journey today.
Share this page
Confused About What Equipment You Need To Get Started With Patchwork & Quilting?
Discover the 14 essential tools and equipment you need as beginner in patchwork and quilting.


Download your FREE copy today.

PLUS comes with handy print out shopping guide!
Quick Links
Get In Touch
Dedicated email coming soon
Legal Stuff When You're Bored
 2023 - 2024 The Patchwork Shop Ltd | All Rights Reserved.
The Patchwork Shop Ltd T/A Quilt With Kim | Registered in England | Company Number 10630597