Which Type of Quilt Binding Do You Need?
Straight Grain or Bias Binding: Which Type Of Binding Do You Actually Need For Your Quilt?
Over the next few weeks, I'm going to walk you through everything you need to know about finishing your quilt with binding — from choosing the right type, to cutting it, joining it, attaching it, and finally achieving those beautifully neat mitred corners. We'll take it one step at a time, so you can dip in wherever you need help most.
And we're starting right at the beginning: the two types of binding, and when you'd use each one.
But first - if you want to watch on YouTube first and then come back to read, you can do that here:
🎥 Watch A Quick Video
What Is Binding?
I promise it's simpler than it might seem right now. There's also one very common misconception about binding that I'd love to clear up while we're here, because it trips up a lot of beginners.
The Great Binding Misconception
You'll see it on pattern instructions. You'll spot it on packets in the shop. You'll hear it in sewing groups. "Use bias binding" or "Cut your bias binding". It gets used as a catch-all term for any binding on any project.
BUT..... not all binding is bias binding. I know, right?
There are two distinct types of binding, and they have different jobs to do. Using the wrong one won't necessarily ruin your project (if your project has straight edges) but it will make your life harder than it needs to be. If you have curved edges though, you definitely need to use the correct type.
So let's sort it out.
The Two Types of Binding: Which One Do You Need?
1. Straight Grain Binding
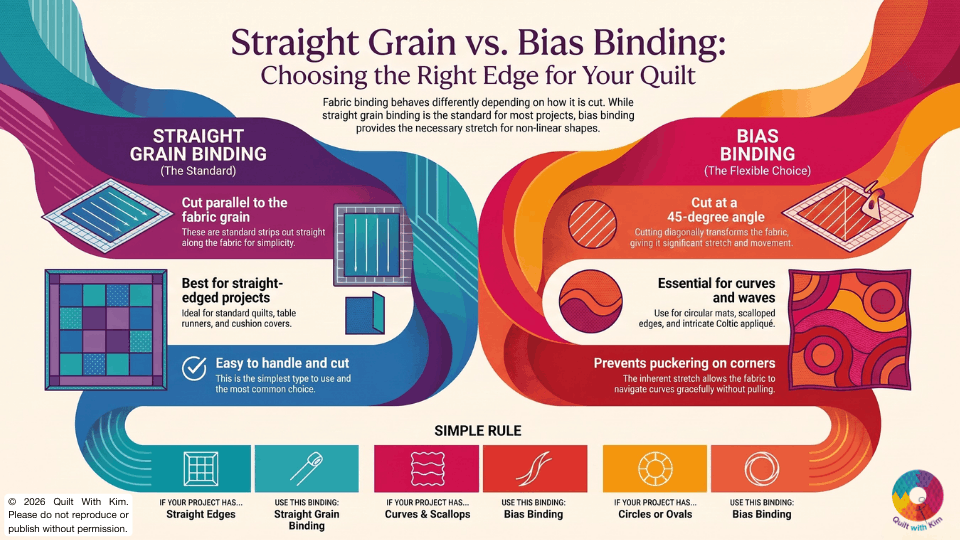
This is the type you'll use most of the time. It works perfectly for any project with straight edges - quilts, table mats, table runners, wall hangings, cushion covers. The vast majority of quilting projects use straight grain binding, and it's much simpler to cut and handle than its bias counterpart.
A good way to think about it: if your binding just needs to travel in a straight line around your project, straight grain binding is your friend.
2. Bias Binding
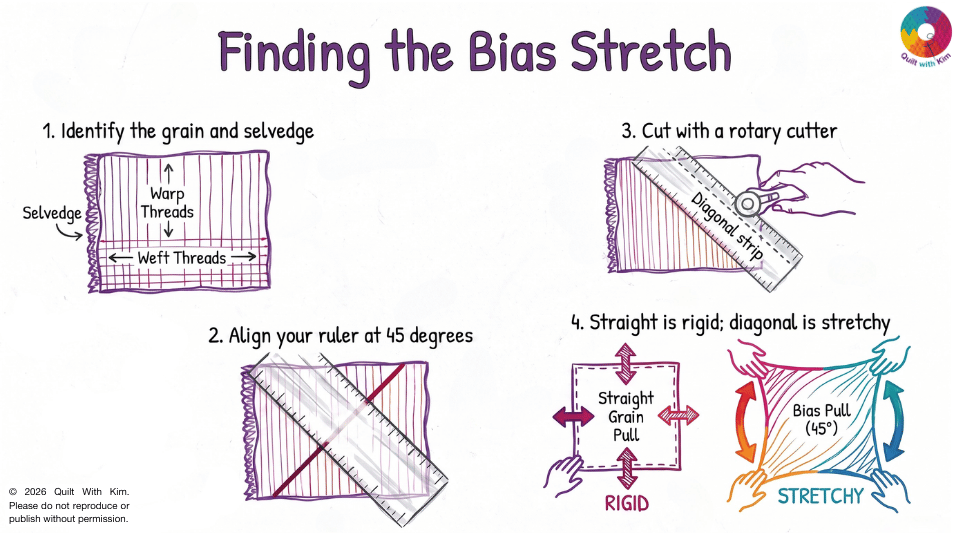
Try this now if you have a scrap of fabric nearby: hold it by two opposite edges and pull. Not much stretch, is there? Now hold it diagonally - corner to corner - and pull. See how much more movement there is? That's the bias. And that stretch is exactly what makes bias binding so useful for curves and corners.
- You're making Celtic appliqué, where the binding travels along flowing curves and intricate shapes
- You're making a stained glass window fabric design
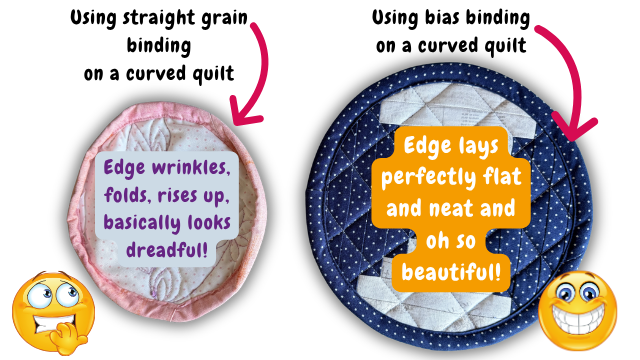
- You have a circular or oval project - a round table mat or a round pot holder, for example
- Your quilt has a wavy or scalloped edge rather than a straight one
If your binding needs to bend, curve, or navigate corners gracefully, bias binding is what you need. That stretch lets it ease around the curves without puckering or pulling. Straight grain binding would fight you on curves - and it would win.
A Practical Example
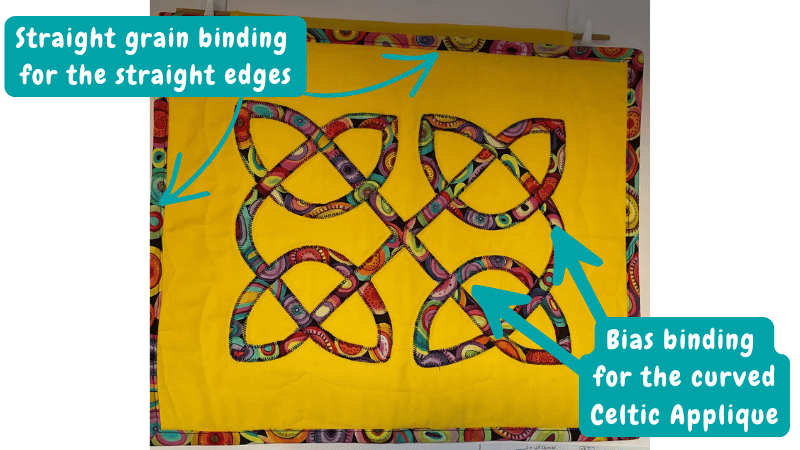
Along the Celtic appliqué knot design itself: bias binding is used. Those flowing, curved lines need fabric that can bend and follow the shape without any pulling or puckering. Bias binding handles that beautifully - whether you are using it as a decorative applique knot as in this instance, or for binding a circular or curved edges project.
Same project, two types of binding, two very different jobs.
The Simple Rule
Straight edges → straight grain binding
Curves and corners → bias binding
That's it. Next time you start a new project, just ask yourself: does my binding need to travel in a straight line, or does it need to go around curves? The answer will tell you exactly which one to reach for.
What's Coming Up in the Binding Series
- How to Attach Binding to Your Quilt - coming soon
- How to Make a Perfect Mitred Corner - coming soon
Kim xx

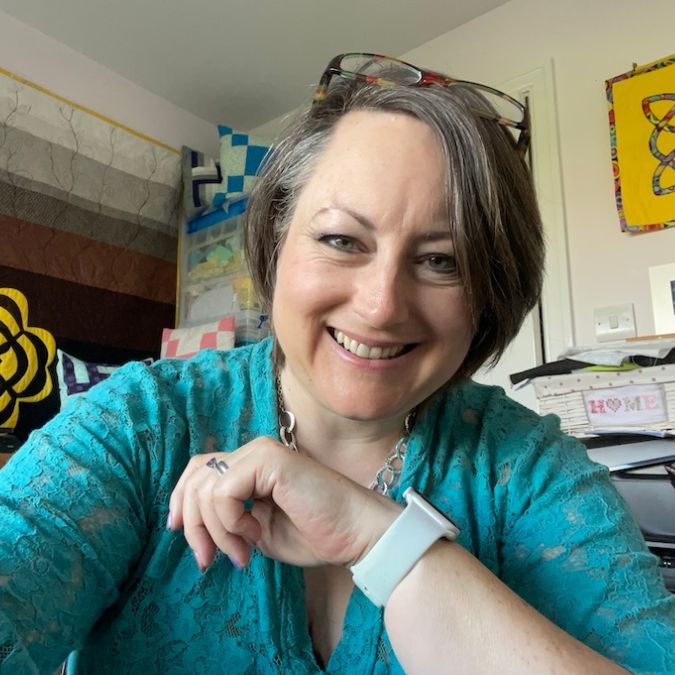
Kim also hosts a popular YouTube channel, Quilt With Kim, where she shares tutorials and tips tailored to beginners. She has also taught patchwork live on air on Sewing Street on TV.
Based in Gloucestershire, UK, Kim enjoys yoga, cooking, and seaside and country walks with her husband, Nige. Her chief quilting assistant, Shadow the cat, is always on hand to supervise her projects.
Download the FREE Beginner Quilter's Toolkit - a free guide to help you to know how to get started with quilting and to join Kim's newsletter list and begin your quilting journey today.
Download your FREE copy today.
PLUS comes with handy print out shopping guide!